6 min read
Did you know that the human brain processes visual information 60.000 times faster than text? Approximately 65% of us are visual learners, which means that we respond faster to visual material, and we are more likely to remember it. Virtual 360 Editor (V360E) was designed with this important fact in mind.
Let’s say you need to provide your cabin crew with safety and emergency training. Many airlines today choose to train in a traditional classroom setting. The initial instructor-lead session is often followed by a visit (or numerous visits 😱) to a mock-up/simulator or even a real aircraft. Both classroom and aircraft/mock-up/simulator training can easily break the bank. But there is a smarter way to execute this kind of training or at least replace a significant part of it.
With V360E, you can present the precise location of various items within your digital environment to your students. They can then explore the topics in the comfort of their homes at their own pace whenever they feel like it.
Now, let’s get a little bit technical.
To point out items in your virtual environment you can use hotspots, which are the main tool in Non-sequenced Content. If this is the first time you hear about Non-sequenced Content, have a look at our article that explains it.
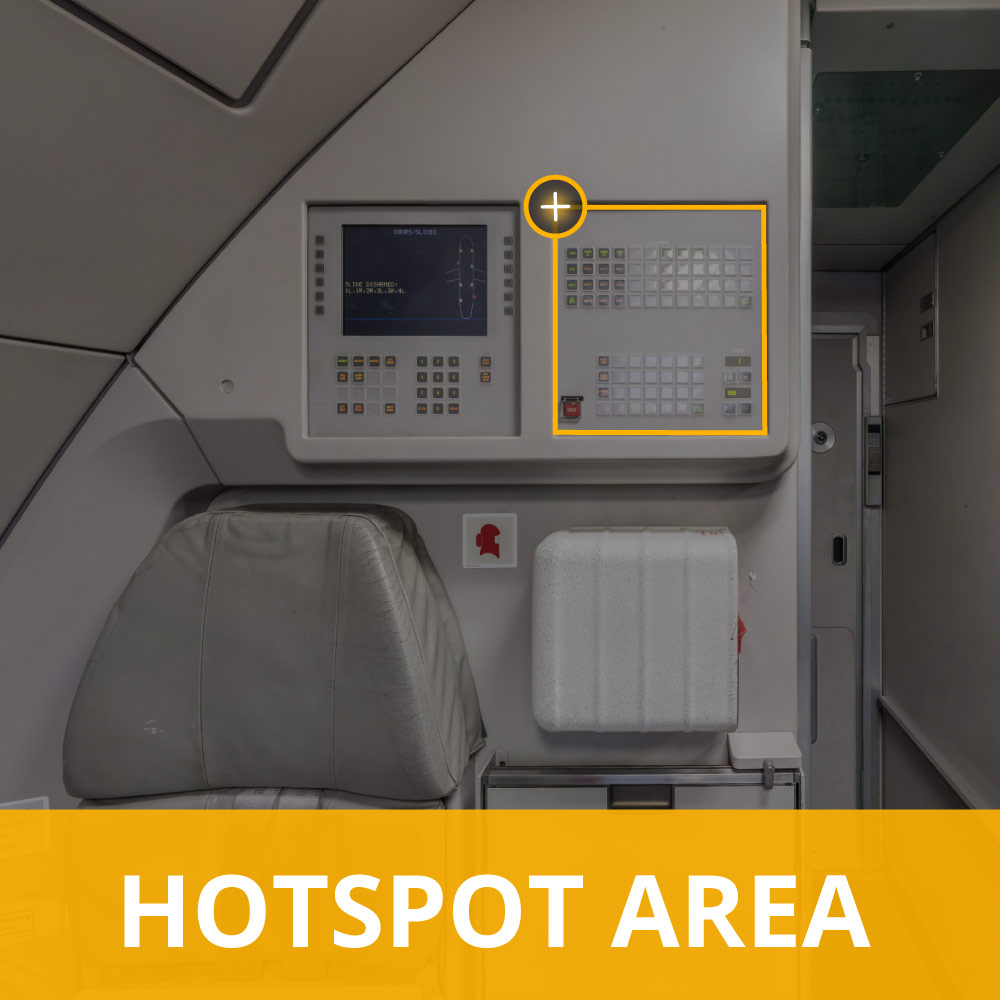
A hotspot is a clickable area that marks a specific location and expands into a pop-up containing information. This information can be presented in the form of text, video, images, or audio. Hotspots help students navigate through the content of the training.
In V360E, there are two different options when it comes to creating hotpots:
Hotspot Icon and
Hotspot Area
Hotspot Icon
Hotspot Icon looks like an upside-down raindrop, and its size stays the same when you zoom in and out. Hotspot icon does not respectively change its size with the panorama, so it is well visible at all times.
PRO TIP: use Hotspot Icon to point out a precise location where precision is essential. You can also use Hotspot Icon to point out multiple locations that are not close to each other. If you are wondering what to do if locations are close to each other, keep reading.
HOTSPOT ICON EXAMPLE: see the demo of a training module for cabin crew below. The idea is for cabin crew to have complete freedom in exploring and learning about aircraft cabin equipment. Go ahead and click some of the hotspots.

Hotspot Area
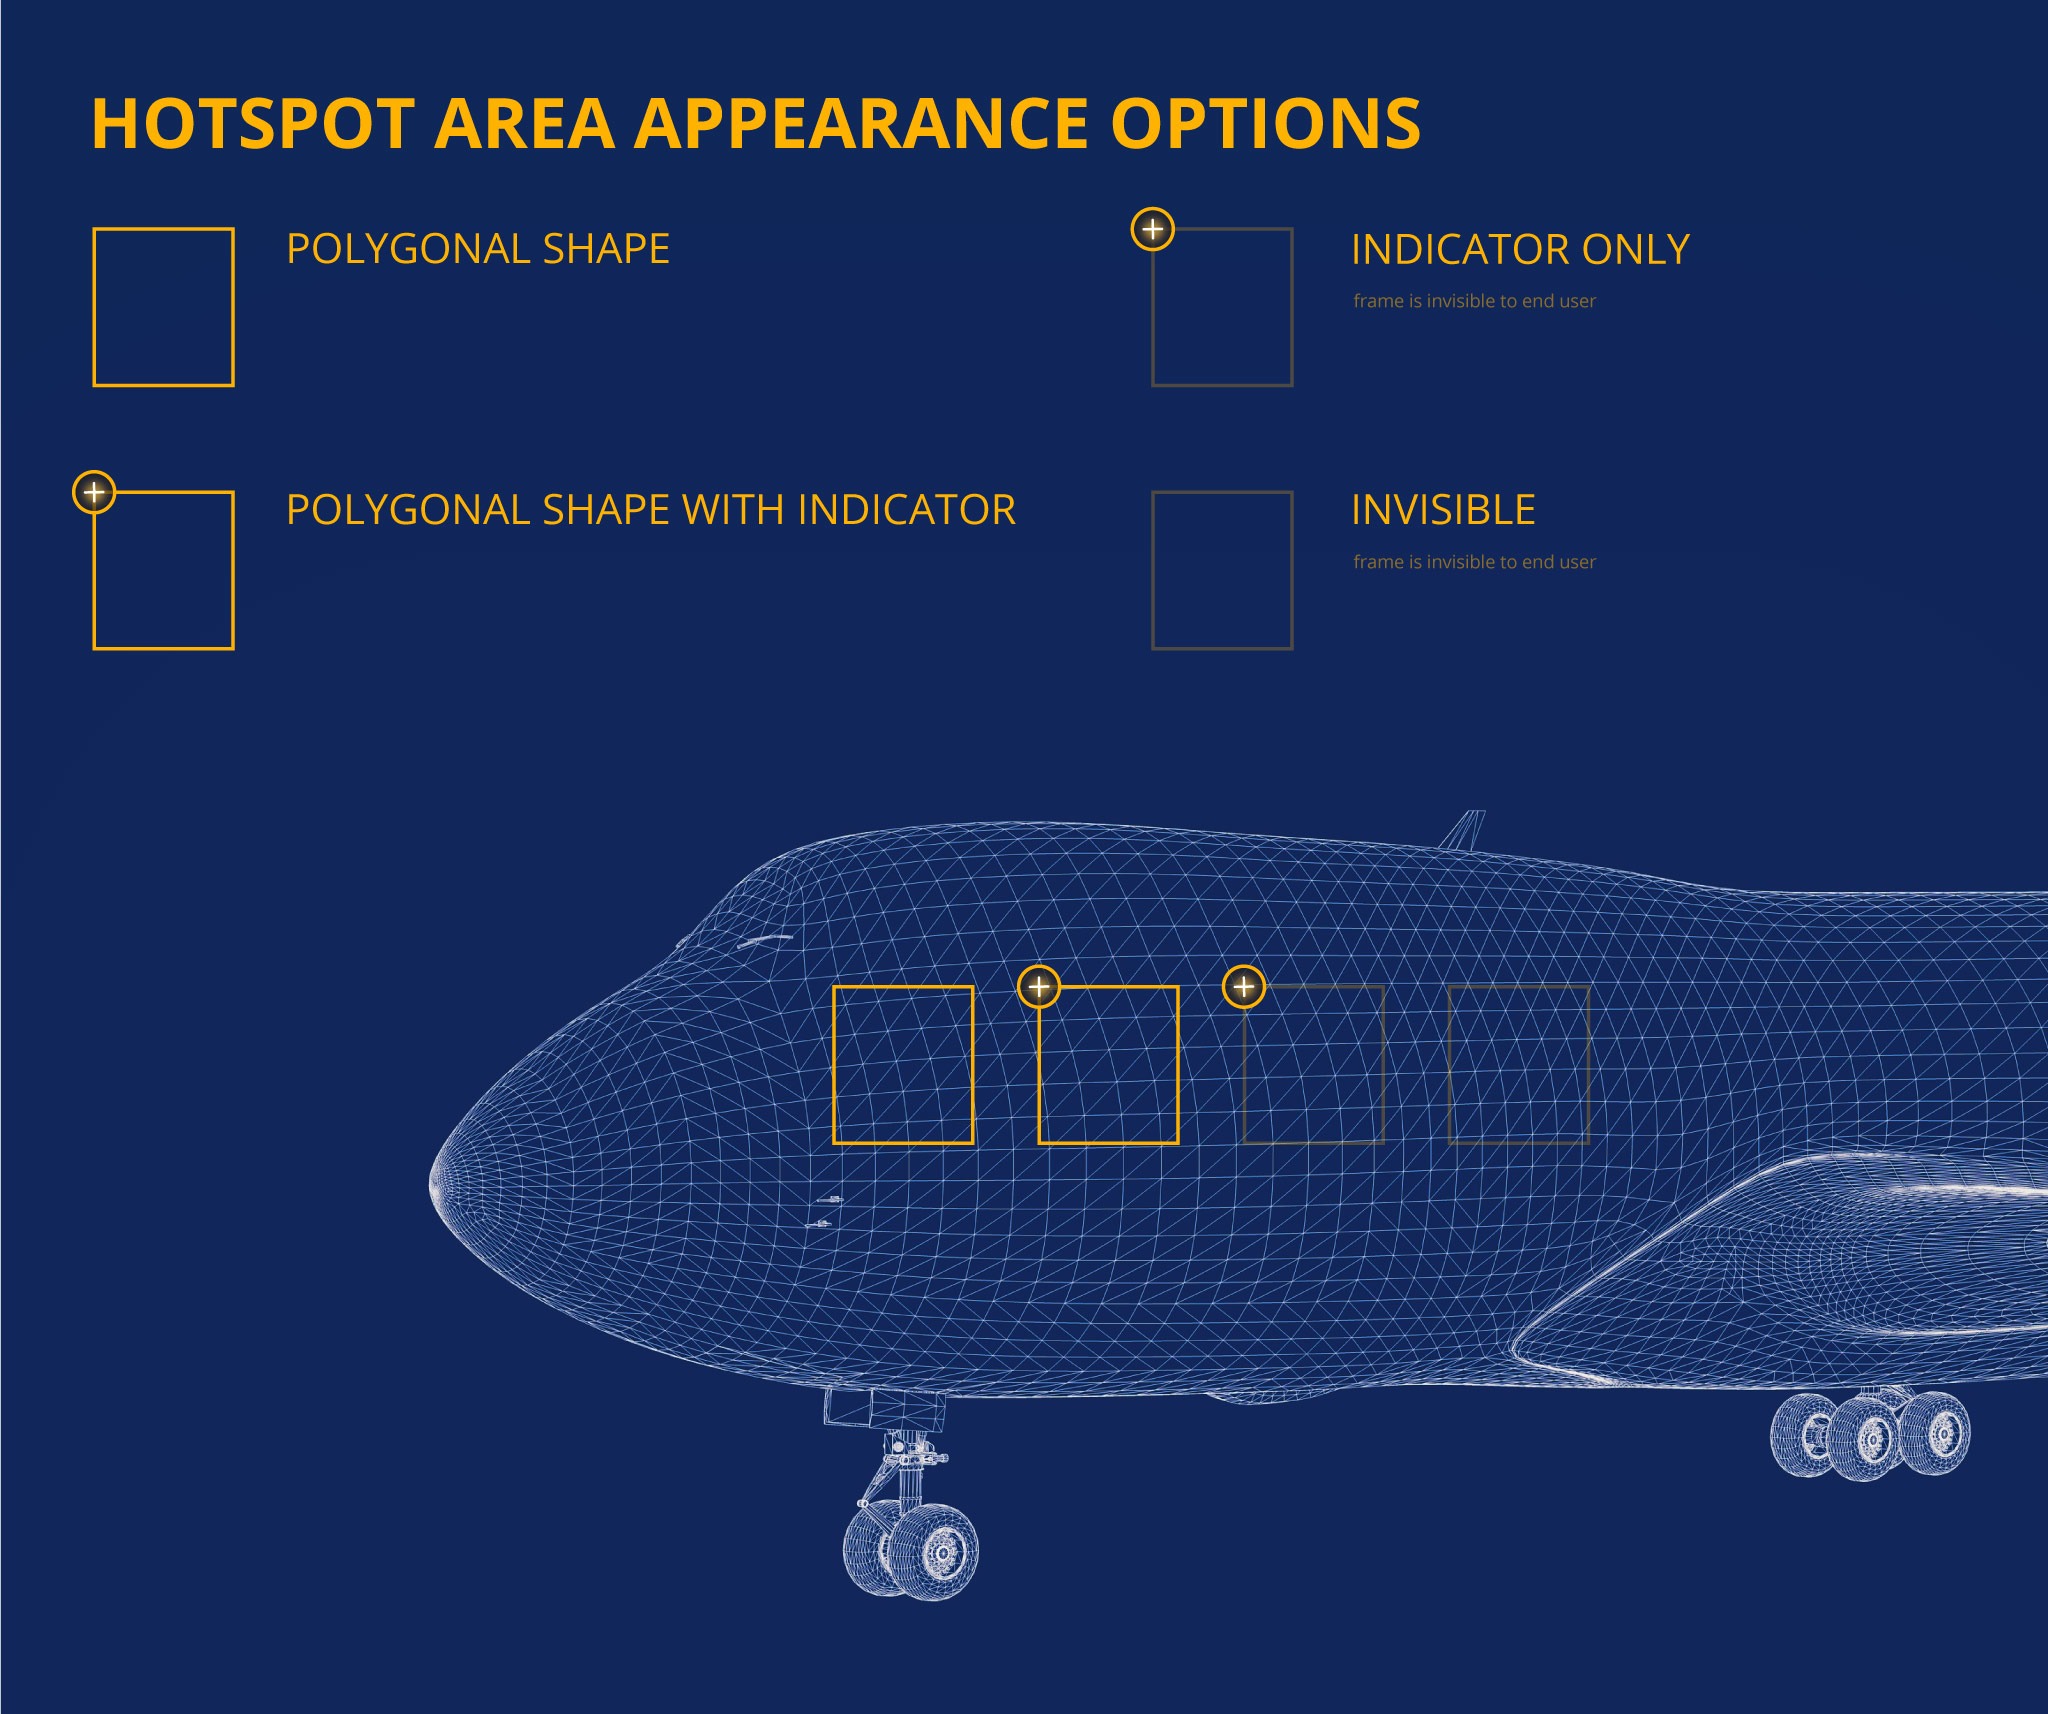
Hotspot Area can have 4 different appearances:
• polygonal shape
• polygonal shape with indicator
• indicator only
• invisible
When zooming in and out, the hotspot area is scaling together with the view.
PRO TIP: use Hotspot Area to point out an area that can include several locations that are close to each other.
Have a look at visualisation of different Hotspot Area’s appearances.

HOTSPOT AREA EXAMPLE: see the demo of a training module for helicopter pilots below. By exploring this “Interactive cockpit”, pilots have complete freedom in learning about cockpit instruments at their own pace. Go ahead and click some of the hotspots.
You can always combine Hotspot Icon and Hotspot Area in one scene. Watch the video below to see the difference between Hotspot Icon and Hotspot Area when zooming in and out:

